I managed to find the knurled nuts that hold the speedometer in and got that done. All the gauges are in place and working. Another step completed. Making the lights work is the next fun electrical project . Could it be as easy as just putting in bulbs? Partially.
I put bulbs in the tail lights and front turn signal lights, hooked up the battery and turned the headlight switch to the first stop. Sure enough, I had running lights. That easy! Next was to check the turn signals. In a previous post I talked about putting the horn ring together. The wiring is a bit complicated because the turn signals are in the horn ring rather than in a separate switch on the columns. Once again I was lucky. The turn signals worked!
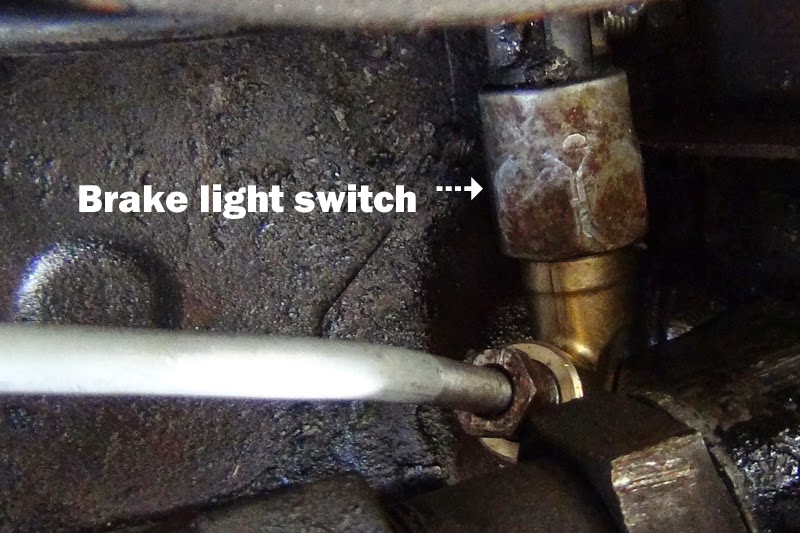
The brake lights are another story. I mentioned in the previous post my issue with having to use a later master cylinder and how that forces a change of where the brake light switch mounts. I decided against a mechanical switch and bought the Y-connector that attaches to the brake booster.
I ran into a problem. The brake booster was mounted too low for the Y-connector to fit. Perhaps the later model cars have a depression in the sheet metal to accommodate the connector. Not ours, though. I had to shim the booster up about 1/4" so the connector fit. Then I had to re-bend the brake line to fit the new connector. I was convinced that it would leak once I got it together, it was such a fussy thing. But no leaks! I bled the upper bleeder screws and now the brakes are even more solid feeling than they were before. And the brake lights work now.

On to the headlights. The right one worked but showed low-beams no matter the position of the foot switch. The left headlight didn't work at all. I took it out and found that there was no connector to the sealed-beam bulb. The wires were cut off at the terminal block. Once this was replaced I tested it. The left headlight now has high-beam but no low-beam. Meanwhile the right headlight is always on low beam. I decided to move on to something else. I'll get back to the headlights later.
Next were the license plate lights. There are two assemblies on each side of the license plate. I found new bulbs for them but that was not enough for them to work. I took them apart and cleaned all the connections with fine sandpaper and got the right one to light. The left one still doesn't work. I'll have to take it apart and clean it more. There is power to the wire that feeds the light assembly so I know it must be a dirty connection.
The instrument lights are a problem. The fuse blows. There is a short in there somewhere. Probably a wire came off one of the instruments and is grounding out. There are about a dozen little lights behind the dashboard and it is practically impossible to see any of the connections due to too much stuff crammed in there. I will have to try to find the loose or missing connection by feel alone. This will take some luck and concentration.
I tested the windshield wiper circuit and it is dead - a project for a later day. The cabin light is likely to work, once I get it installed, but the dash pad needs to be re-done and this light mounts into it so I am going to wait until the dash pad project is completed.
With the brake lights and turn signals working the car is now legal, for day driving anyway. The running lights work and it seems there is just a little bit of fussing to have the headlights working properly. I am going to go ahead and insure the car and notify the Motor Vehicle Department that our 190SL is no longer a non-op vehicle!
Even though it has practically no interior, no glass in the doors, no top, and only one seat, I hope to take it for its first drive on the road soon.


No comments:
Post a Comment